Book: 3D Printing For Product Designers

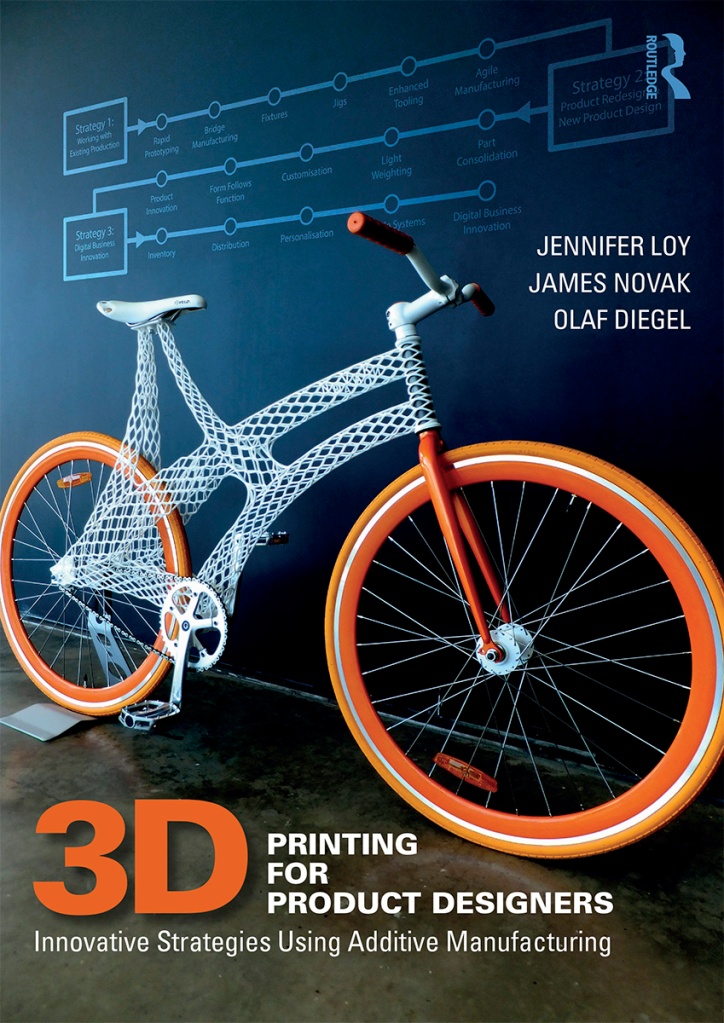
I’m extremely excited to share some news with you all! For the past 2 years I’ve been writing a book that is specifically focussed on 3D printing strategies and case studies for product designers. I’ve been lucky enough to work with Prof. Jennifer Loy and Prof. Olaf Diegel, both very well known leaders in the field. The book is called 3D Printing for Product Designers: Innovative Strategies Using Additive Manufacturing, and is now available for pre-orders direct from the publisher Routledge (at a discounted price!).

In many ways this book closes my personal first chapter in the 3D printing industry, which began in 2009, and brings together experiences and lessons learned working in industry, with industry, and on cutting-edge research projects at several of Australia’s leading universities specialising in 3D printing. Of course, my 3D printed bicycle has been a big part of that journey, and was selected by the team for the front cover, which is a real privilege. And yes, there is a detailed case study in the book that explores this project in more detail for anyone interested.

Obviously there are already some fantastic books on 3D printing, with Ian Gibson et al.’s book Additive Manufacturing Technologies probably the most well known, originally published in 2015. Our co-author Olaf Diegel also led writing a more recent book called A Practical Guide to Design for Additive Manufacturing, and 3D Hubs have a nicely illustrated book called The 3D Printing Handbook. There are others, but one thing most of these books have in common is that they’re particularly written for engineers, with lots of technical guidelines and explanations of the different 3D print technologies (which can date quickly given the rapid pace of technology developments). There isn’t a book written specifically for product and industrial designers using 3D printing, and there isn’t one that helps companies understand how to effectively adopt the technology. That’s where our book fills the gap.

The book revolves around 3 overarching strategies that can be followed chronologically, or selectively chosen depending on a company’s specific needs:

  • Strategy 1: Working with existing production – includes rapid prototyping, bridge manufacturing, fixtures, jigs, enhanced tooling and agile manufacturing.
  • Strategy 2: Product redesign and new product design – includes part consolidation, light weighting, customisation, form follows function and product innovation.
  • Strategy 3: Digital business innovation – includes digital inventory, distribution, personalisation, scalable systems of supply and digital business innovation.

The goal is to help designers and engineers lead their company or client through a process of incremental change. This is particularly important for established companies with a workforce (or management) resistant to change. It can also be used to inform new entrepreneurial activity, allowing startups to begin at the cutting edge of digital business innovation.

Real-world case studies used to illustrate these strategies include bicycles (of course!) and other sports products, guitars, furniture, medical devices and prosthetics, jewellery, heat exchangers and more. Many of these have come from our friends and colleagues around the world, and the book features over 100 high quality colour photos to illustrate these.

The book is currently in production, so I can’t share a lot more right now, but I look forward to sharing some more detailed posts soon to give previews of different sections of the book. Stay tuned!

– Posted by James Novak
My First NFT Collection for 3D Printing

Welcome to my first post about NFT’s and 3D Printing!

If you’re new to NFTs like me, I hope you find this interesting with a few little tips and tricks along the way. If I can say one thing about NFTs (aka. Non-Fungible Tokens), it’s that they’re difficult to wrap your head around. Even just a few months ago, I was telling people I didn’t have any interest in making them or buying them. But here I am, dipping my toes in the water, and enjoying the learning process. For me, I found that just jumping in, committing some time and money, and making some NFTs was the best way to figure it all out. You may also need to jump into cryptocurrencies as well, but let’s not fall down this rabbit hole now!

As for explaining the whole concept of NFTs, I’ll leave that to The Verge or Investopedia to describe much better than I can. What’s important to know is that it is essentially a way to buy and sell digital information, which might be an artwork or animation, or even a 3D model. It’s also a way to verify who actually owns the information, even if other people are using it.

This obviously presents some opportunities for 3D printing files. If you wander around my blog, you’ll find dozens of free files that I’ve shared on websites like Thingiverse and Printables (formerly PrusaPrinters). These are normally shared with a Creative Commons license like CC BY-NC-SA 4.0, allowing anyone to download, 3D print, remix, copy and share the design, as long as they don’t try and sell it. I’ve even sold some files under different license terms. However, what can be much harder to document is who actually owns the design if thousands of people have downloaded it. For example, the designs I share online all link back to my profile, and it’s relatively clear who created the original. As long as someone doesn’t re-upload the file under their own profile, which is unfortunately a common problem! But what if you really love a particular design, and don’t just want to download a copy of it like everyone else but own the rights to it? Typically this would require some contracts between the designer (e.g. me) and the buyer to formalise, including payment and royalty conditions. This is where the NFT system can work nicely, as it is set up to be a digital contract that documents this, and supports the transfer of payments and royalties.

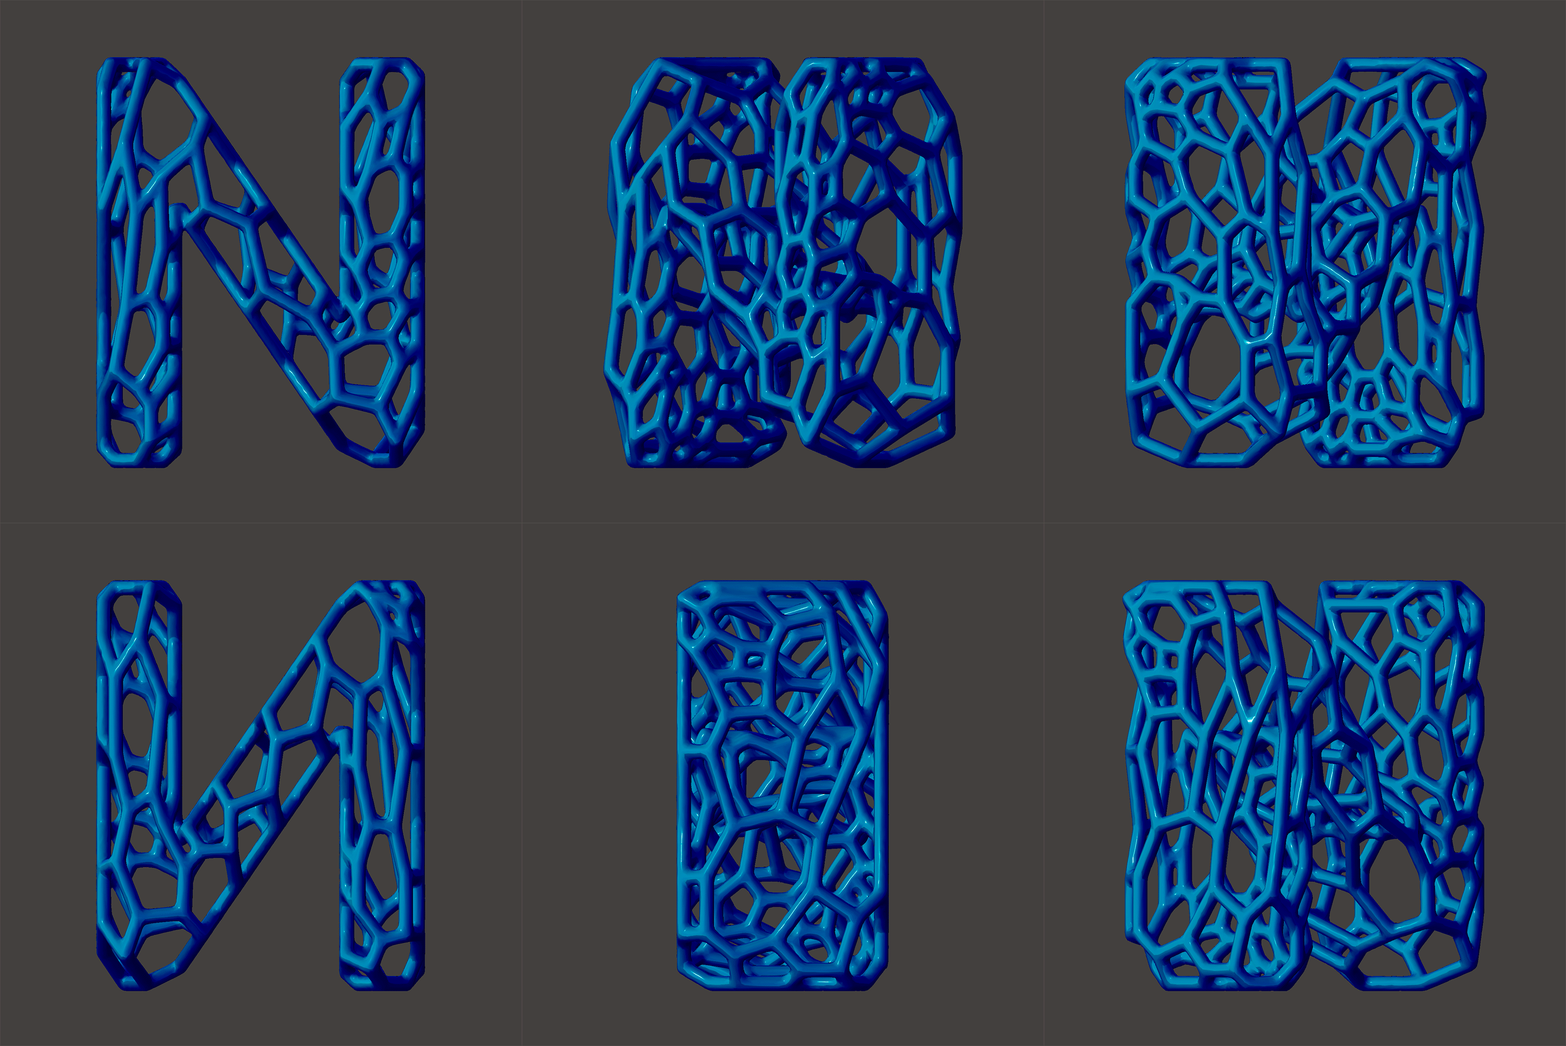
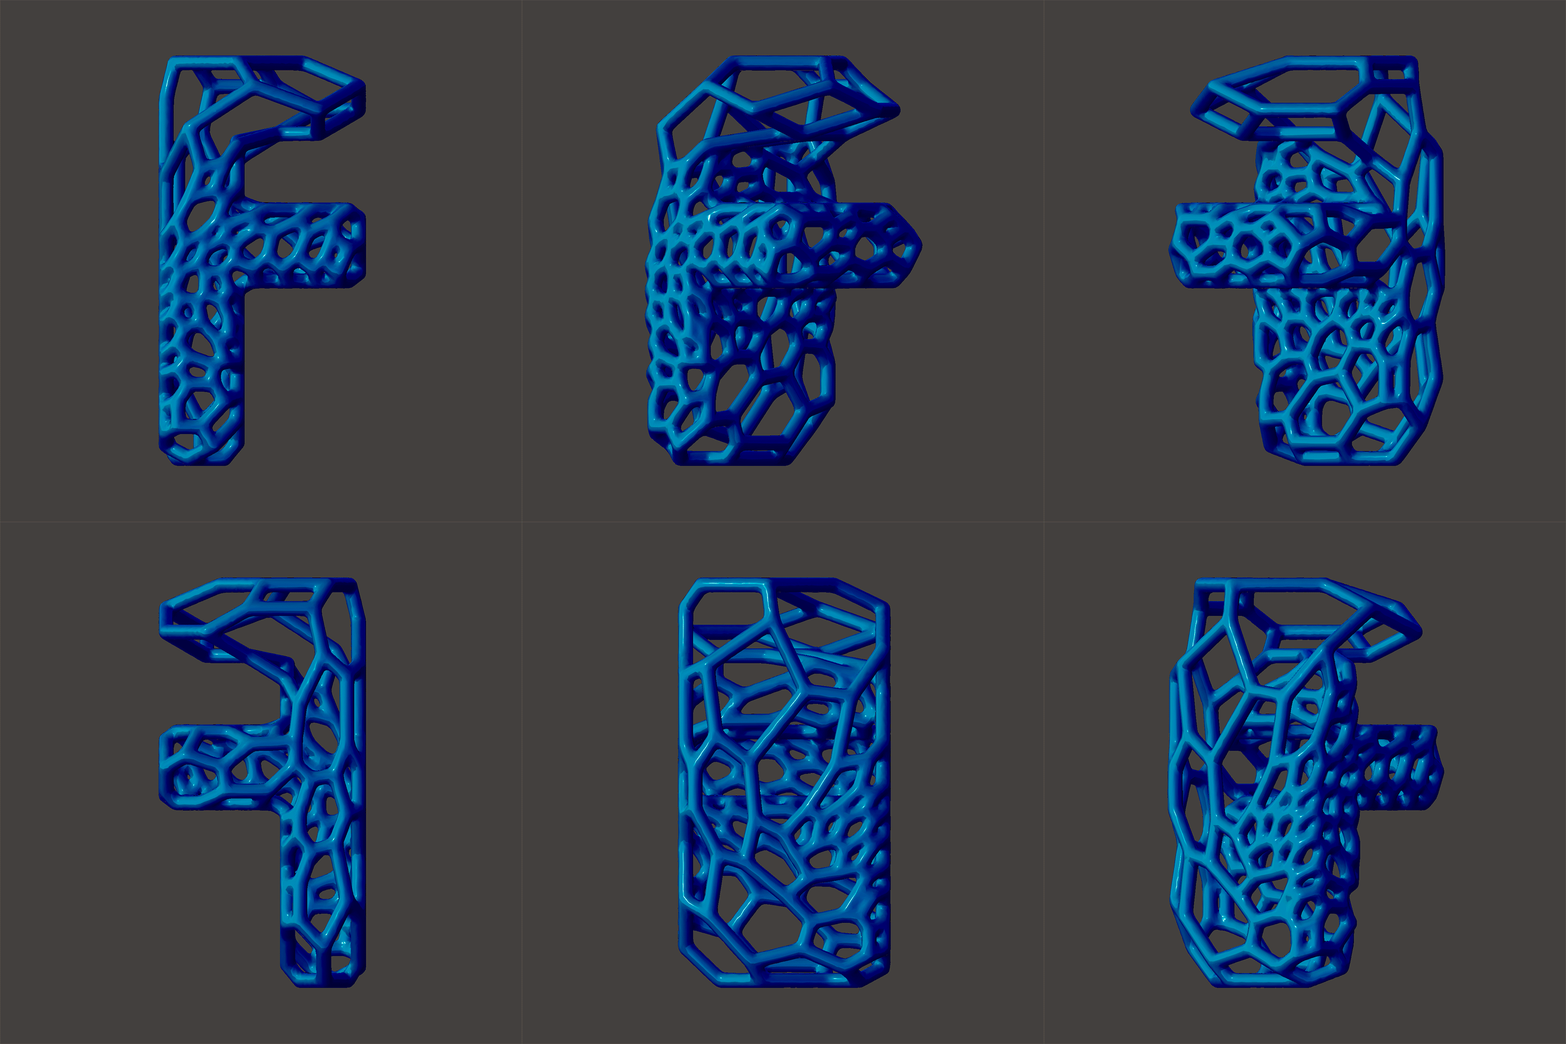
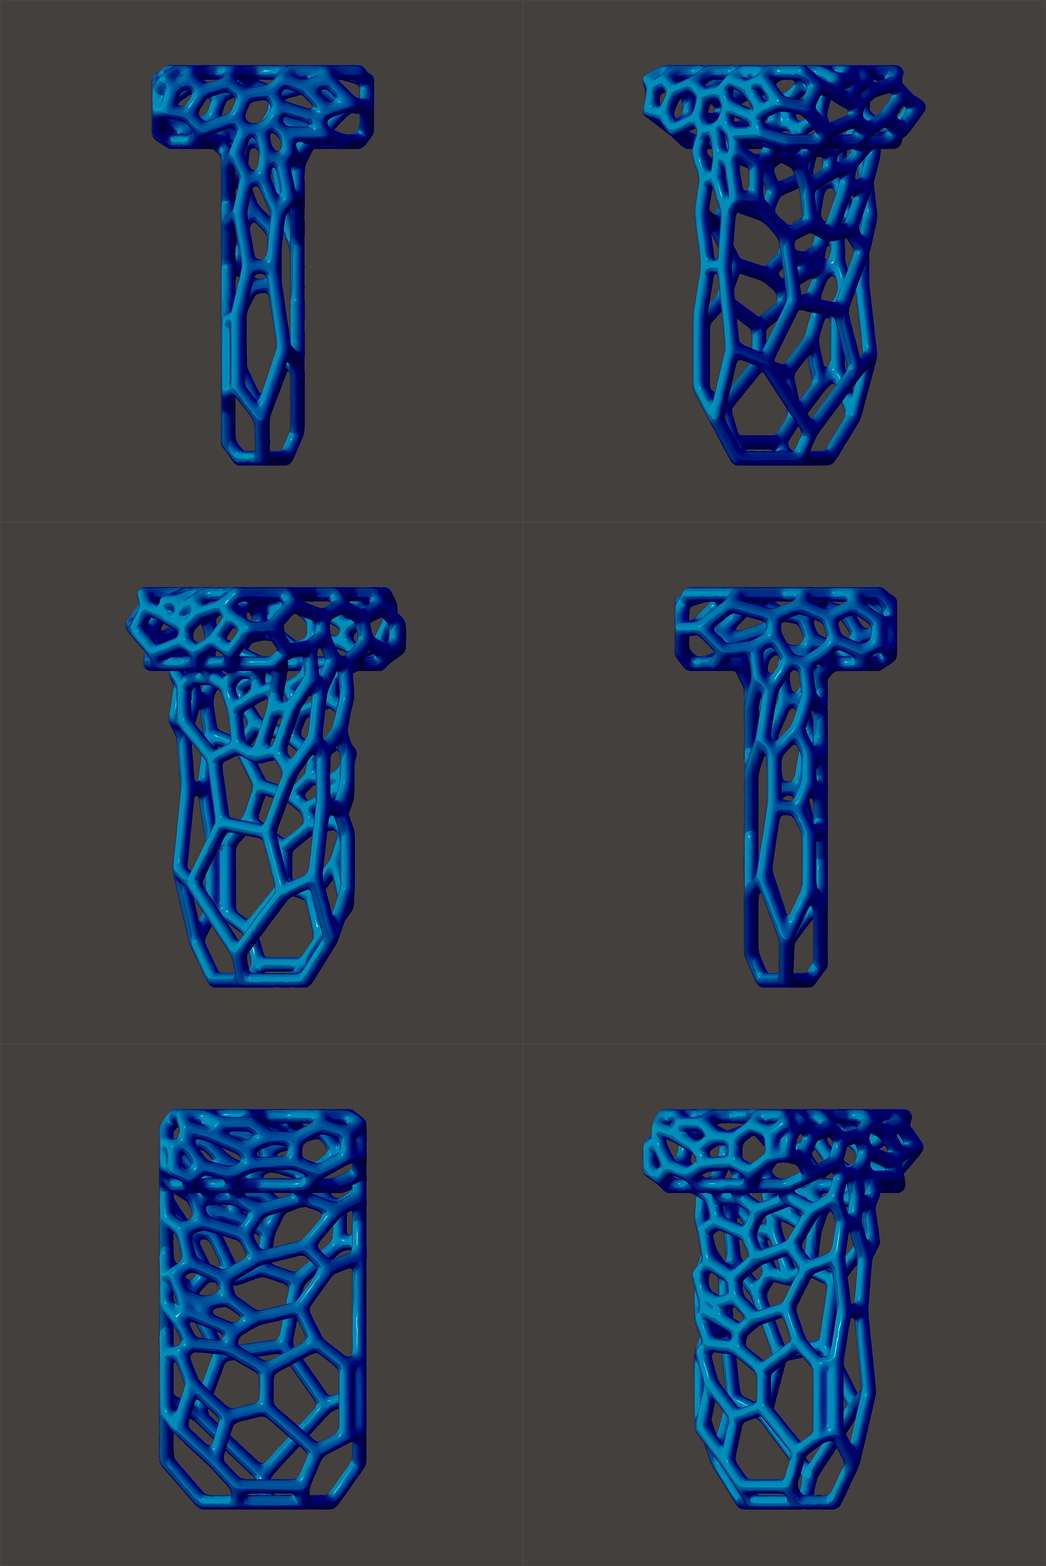
This is what I wanted to learn more about. So, I’ve created my first NFT collection for 3D printing, which is called BITSnATOMS – 3D Typeset for 3D Printing. As the name suggests, it’s a collection of 44 numbers, letters and symbols that people can collect to represent their name, initials, brand, etc. Through 3D printing, they can exist in the digital and physical worlds at the same time, which is a bit beyond what most NFTs offer. The GIFs below give you an idea of the voronoi geometry used for the typeface, but if you check out the link to the collection you’ll be able to actually interact with the 3D models.

The design itself combines several of the things I’ve shown in tutorials on this blog before, for example my video showing how to lightweight a bike brake lever. I might write another article later about how I actually created these, but the short version goes something like:

  • A basic 3D model was created in Solidworks and exported as a STL file.
  • This mesh was then rebuilt in Rhinoceros to have a more random and controlled collection of faces.
  • Next, it was imported into Meshmixer to create the voronoi lattice structure you see.
  • Lastly, and this part is important for NFTs on OpenSea, I used Microsoft Paint 3D to convert the STL file into a GLB file.

A GLB file is used for virtual reality, and OpenSea can directly embed this within its listing of your NFT, making it interactive so people can properly view your design. At the time of writing, there was no support for other 3D file formats that might be used for 3D printing, and there was also no GLB export method in any of my CAD packages. The good news is that GLB files open in Cura, making them directly 3D printable, or they can be opened up again in Paint 3D and converted back to STL files. There are also plenty of free online converters.

The actual process of listing NFTs gets a bit more complex (at least for a newbie). Thankfully OpenSea provides really great tutorials on getting set up with an account, as well as creating and listing your first NFT. I followed these to the letter, and had no issues, opting for a MetaMask wallet to hold my cryptocurrencies. Again, I could write a whole article about this part of the process, and may do so in future.

The rest of the NFT process is much like listing any item for sale online: Uploading the actual NFT (or information about how it can be accessed after purchase), a description, price, listing duration and you’re done. Multiple items can form what’s called a “collection,” although I found that the process of uploading each item individually was a bit painful, there is currently no batch upload process. Most of the things you hear about NFTs are actually collections, sometimes many thousands of items, rather than one-off items, and some of the items in these collections are worth hundreds-of-thousands of dollars each! For example, the Bored Ape Yacht Club is probably the most famous collection, with 10,000 artworks. The cheapest of these is currently selling for 111 ETH (which is worth $395,000 USD, or $527,000 AUD)! So multiply this by 10,000 and there is some serious money involved in this collection.

But this would be the exception, rather than the rule, for NFT success.

The challenge now seems to be all about marketing – there are so many millions of NFTs available that it’s extremely difficult to stand out, especially as a newbie who has neither bought nor sold an NFT before. So stay tuned as I figure out this part! For now, if you check out my collection and could share it on your social media, that would be a fantastic start.

I hope this was a useful intro to NFTs for 3D printing, please comment with any questions or ideas, or let me know what you’d like me to cover in the next blog article.

– Posted by James Novak

3D Printed Outdoor Lights in PETG

It’s official – my entire house now uses 3D printed light covers!

If you follow this blog you may have seen some of my previous indoor light covers, featuring a 3D scanned sea urchin shell and a pineapple. Of course, I couldn’t stop with indoor lights, especially since the outdoor wall-mounted lights on my house looked like the cheapest fittings available. They were desperately in need of an upgrade.

Luckily the fitting includes a piece that is easily unscrewed to accommodate standard DIY light covers. A few simple measurements, including the diameter of the fitting and distance of the protruding light bulb, meant that I had everything needed to create my own design in CAD. For this one I decided to use Fusion 360, just to keep my skills up as I’ve done a few projects in Solidworks recently. The only other limitation was the size of the Prusa MK3S+ build volume (250 x 210 x 210mm), as I wanted the light cover to be 3D printable in a single piece.

Putting all of this information in Fusion 360 gave me a starting point, and of course I began experimenting with a few simple ideas. The one that stuck was this collection of lofts that twist in different directions. Not overly complex, just a clean design that is easy to clean (a complex lattice would just invite spiders!) and protects the lightbulb from sun/rain. Because these are mounted quite high on the walls, what I really wanted was a cool effect when you are looking directly up at the light from below – see the top right image.

Something else I experimented with for the first time with this design was 3D printing using PETG filament – specifically, PETG from eSun. Why? Mainly because PETG has good UV stability so should last while out in the elements and sunshine. But what I’ve really enjoyed is how easy it is to print with – no warping, good adhesion to the build platform and no smelly fumes while printing. Happy days! I actually used the default PETG settings in PrusaSlicer and they seem to be dialled in nicely (no surprises really, thanks Prusa). The material also has a translucency, so the light shade has a bit of a glow when the light is on as you can see in the photos. If you’re looking for more details about the material properties and slicing settings for PETG, this article is a good starting point.

And of course, I’m giving this design away for FREE! Download from your favourite 3D file marketplace: Thingiverse, Pinshape, Cults, MyMiniFactory or PrusaPrinters.

Happy 3D printing.

– Posted by James Novak

3D Printing in Sport – Hit or Hype?

If you’re into 3D printing, no doubt you are familiar with some of the ways it is being used in sports. Some of my own products (above) have included a 3D printed bicycle frame, smart bicycle helmet and surf fins, while in the media products have included shoes, golf clubs and shin pads.

However, as a researcher, I was interested to know how this translates into academic research. How many research studies have been looking at 3D printing for sports products? How much improvement does a 3D printed product offer over a conventional one? Which sports are adopting 3D printing? Working with my brother, Dr Andrew Novak, we hypothesized that given the amount of coverage in 3D printing media, there should be quite a large amount of research supporting the developments of iconic 3D printed sports products, as well as novel developments that haven’t even made it into the media yet. The results – published in a paper titled ‘Is additive manufacturing improving performance in Sports? A systematic review‘ – were surprising (preprint version freely available).

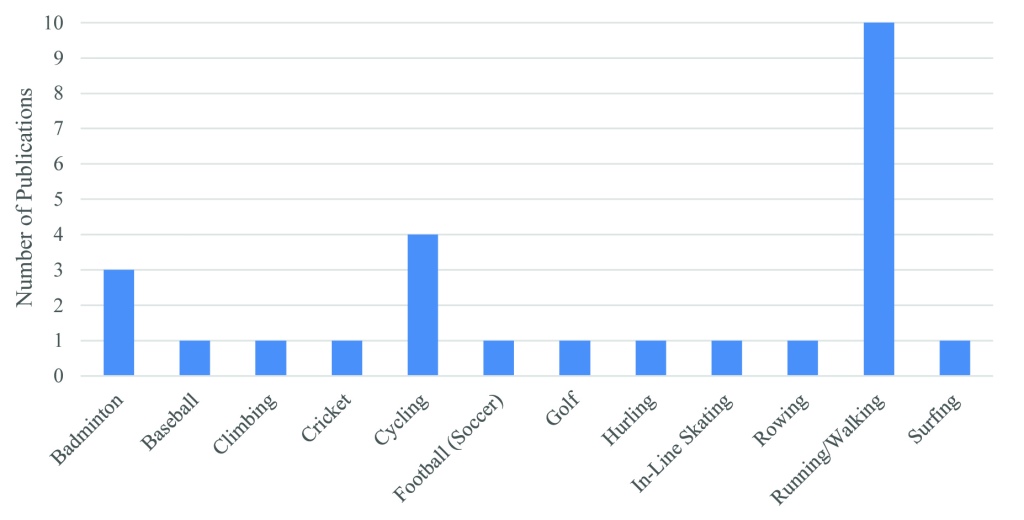
Up until May 2019, we found only 26 academic studies that provided any empirical evidence related to 3D printing for sports products. The graph above shows which sports, and how many articles have been published. The first of these appeared in 2010. Running/walking was the most popular sport with 10 articles (38%), followed by cycling with 4 articles (15%) and badminton with 3 articles (12%). All other sports – baseball, climbing, cricket, football (soccer), golf, hurling, in-line skating, rowing and surfing – had only been assessed in single studies. This means that a lot of research into 3D printing of sports products are just one-off projects, and indicates that there may be very little funding/interest to continue building larger projects.

It also suggests that any research being done to support mainstream commercial applications of 3D printing, for example for brands like Adidas and Specialized, is protected by intellectual property (IP) and not being published.

10 articles (38%) observed improvements in performance of products developed via 3D printing compared to conventionally manufactured products, 8 articles (31%) found a similar performance, and 5 articles (19%) found a lower performance.

From a technical perspective, powder bed fusion technologies were the most utilized with 50% of articles using either selective laser sintering (SLS) or selective laser melting (SLM), although 52% of articles did not name the 3D printer used and 36% did not name any software used to design or optimize products. 3D scanning technology was also utilized in 11 articles (42%).

So, is 3D printing in sport a hit or hype? Based on this research it is clear that within academia, 3D printing is still in the very early phases of consideration, and seems to be significantly behind industry. While you may be able to go and buy some 3D printed running shoes or insoles, or cycle on a 3D printed saddle, you won’t find any objective data in journal articles on these products or much research to suggest that 3D printed products are any better than conventionally manufacture products.

– Posted by James Novak

3D Printed Mounting Brackets

Brackets are pretty boring, I know, but being able to 3D print exactly what you need, for just a few cents, just makes good sense (see what I did there?).

I wanted to mount a LED strip underneath my kitchen bench top, but also wanted it to run off batteries so I didn’t have chunky cords to plug in for power. The set that I ended up buying had a battery pack which needed to be mounted along with the strip, as well as a remote. One option would be to use double sided tape, however, this would make accessing and changing the batteries painful. So, a simple bracket was needed. While doing this, I also decided to mount the remote so it wouldn’t get lost.

Like many of the projects on this blog, the entire process from CAD to finished 3D printed parts only took a few hours. Solidworks was used for the CAD modelling, while the brackets were printed on a Wanhao Duplicator i3 Plus in PLA. A couple of screws up into the bench top and job done. Secure and out of the way, but easy to remove the remote and battery pack when needed.

If you’re interested in more quick projects like this, check out my special friction hooks or hex business card holder tiles.

– Posted by James Novak

3D Printing Pop Culture & Viral Objects

20190508 Pop Culture 3D Print

As regular readers of this blog will know, I’ve been involved with 3D printing, making, education and various online communities for a while now. Which is why it’s very exciting to share my latest piece of writing, a book chapter titled “The Popular Culture of 3D Printing: When the Digital Gets Physical” which I wrote with former colleague and fellow maker Paul Bardini from Griffith University.

As the name suggests, the chapter looks at the popular cultural context of 3D printing, rather than the more technical aspects featured in most academic writing. As makers, we are both really interested in the growth of 3D printing and spread of 3D printing files on platforms like Thingiverse, MyMiniFactory and others, so we got a bit scientific and collected some data. The results are very interesting!

Print

Firstly, one of the things we did was collect the total number of files available from a range of 3D printing file repositories, as well as other more general 3D file repositories. Above is the data we collected (on 26th August 2018) which clearly shows Thingiverse to be the largest specific 3D printing file website. This is no surprise given that the website began in 2008, well before most competitors, building a network effect that still seems to be going strong despite some of the most recent challenges Thingiverse has been experiencing. However, there are plenty of other much larger libraries of CAD files that could be searched for 3D printing files, and even though some will be specific to certain CAD software, there’s always a way to make these 3D printable.

Print

Given the size of Thingiverse, we then looked at the most popular designs on the platform, collecting data (you will have to check out the full chapter for this!), and then calculated the average downloads per day for these designs. The graph above shows this data against the date the design was uploaded to the platform. Some of the names you may recognise: #3DBenchy, Baby Groot, the XYZ 20mm Calibration Cube and the Xbox One controller mini wheel. But what does it all mean?

Well, the short story is that objects uploaded to Thingiverse today will be downloaded in higher volumes per day than objects uploaded earlier in Thingiverse’s history. The trend line is increasing, matching the growth of 3D printer ownership; more people are downloading more things, with the Xbox One controller mini wheel recording 700 downloads per day when it was newly released. However, #3DBenchy is by far the most downloaded design of all time, right now having been downloaded over 900,000 times on Thingiverse alone, as well as being available on almost every other 3D file platform. This has lead to our classification of it as a “viral object.” Similar to viral videos and viral media campaigns, a viral object extends these concepts into the physical world through 3D printing, being first spread rapidly through online file sharing communities, then turned into physical objects in their thousands despite each being made in a different location, by a different machine.

This raises some interesting questions:  A viral video or piece of advertising made up of digital bits can easily be deleted, but how do you delete a viral object made up of physical atoms? Simply discarding 3D prints into landfill is unsustainable, and new solutions are necessary that make recycling of 3D prints affordable and accessible to the masses. It is also worth looking at the quantities an object like #3DBenchy is being downloaded and 3D printed, which is clearly in a magnitude similar to injection moulding and the mass production paradigm that 3D printing is supposed to disrupt. While it’s useful to have an object to calibrate and compare 3D printers, it’s also interesting to see that people still want to print and own the same object, rather than being truly individual.

The trend for viral objects is certainly one to watch, and the chapter provides a detailed analysis of this and other emerging trends related to 3D printing and pop culture. If you’re interested in reading the chapter, you may use my author discount code “IGI40” to get a 40% discount, or if you’re at a university you may find you already have access through your library subscriptions. Paul and myself certainly welcome your feedback and thoughts 🙂

– Posted by James Novak

Shim the 3D printed shim

IMG_20190226_3D Print Shim Doorstop

We’ve all experienced that wobbly table at a cafe and struggled to wedge coasters and napkins under the legs to balance it out. This is where you need a shim, a small wedge that can fill the gap and ensure your drinks don’t go flying. Shim is also fun to say, quick to 3D print, and a good test of your print settings due to the top surface exhibiting the stair-stepped effect.

There are many designs available on popular 3D printing file websites, but I just wanted one that was a useful size (easy to carry with you in a small bag) and that said what it was. So here it is, Shim the shim! You can download it for free on Thingiverse, Pinshape, Cults or MyMiniFactory. Alternatively you can follow the basic outline of the design process below to make your own from scratch in your favourite CAD software. It’s similar to some of my previous designs including an “edditive” desk logo which might give you some inspiration for different ways to use text in 3D.

IMG_20190226_Solidworks TextShim was designed in Solidworks by using the text tool on the top sketch plane. The key is to squish all of the text together so that the letters intersect, meaning they will 3D print together as a single object (in Solidworks you can simply change the spacing of text within the text tool). The text was then extruded 10mm, creating solid geometry. All you need to do to create the wedge shape is then slice a triangular portion off the top, which in Solidworks uses the extruded cut tool. Save to STL and 3D print, it couldn’t be much simpler!

This is a nice quick 3D print and could easily be used as a keyring or give-away item, especially if you design your own. Enjoy, share and print!

– Posted by James Novak

3D Printed Medal and Trophy

IMG_20181024 3D Printed Trophy Medal

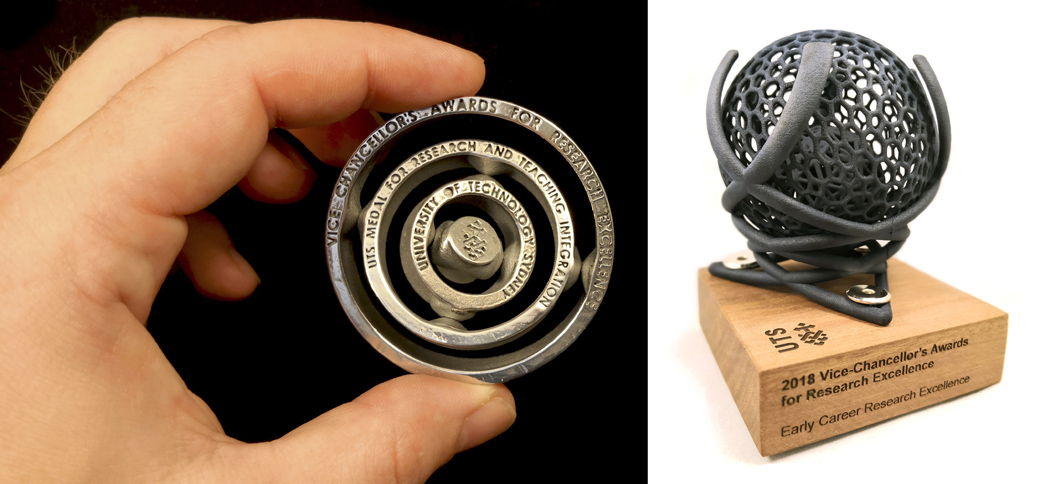
As a product designer focused on 3D printing in my job at the University of Technology Sydney, it was no surprise that I found myself being asked to design some 3D printed awards for the end of year 2018 Vice-Chancellor’s Awards for Research Excellence. And while not receiving an award (yet!), I think it’s even more fun to get to be designing them – besides, now I can print them out for myself!

I was asked to design 2 different awards which you can see pictured above. The first were a set of 3 medals, and my only brief was to have them 3D printed in metal, and for them be approximately the size of previous medals given out for the awards. I based my design on a spinner concept which I’ve previously printed, with an important feature being the cone-like details which hold this assembly together when printed as a single part. There is no support material required, with one of my goals being to highlight through the design the capabilities of 3D printing in metal. For recipients, my goal was to create something playful and engaging, rather than most medals which are kept in a case and quickly forgotten. Thanks to my friend Olaf Diegel at Lund University for printing these in aluminium and sending them to us in time!

VID_20181023_095036 GIF

For those familiar with metal 3D printing (Direct Metal Laser Sintering to be specific), you can probably guess there was a lot of manual post-processing of these medals to remove the base supports and polish the surfaces. Below you can see the medal as it comes out of the printer on the left (once cut from the build plate), and the final polished version on the right. All of the base support material you can see in the raw version had to be filed away while held in a vice, before going through a lengthy process of polishing. Slow, painful work, but you haven’t truly 3D printed in metal until you’ve gone through this process, it makes peeling away plastic support material from FDM prints seem like child’s play!

cof

The second award was a trophy which also continued with the 3D printed assembly concept. My only brief for this design was for it to be printed on our own HP Multi Jet Fusion 3D printer, which is very similar to SLS printing. Many of us have seen the “ball in a ball in a ball” type of prints which are often shown at 3D printing expos and events, and I built off this to incorporate a lattice frame to contain the balls. The basic design was done in Solidworks, however, the balls were just solid spheres at this stage. I then exported them into Meshmixer in order to apply a lattice structure to them, using 2 different geometries. All parts were then imported into Meshmixer in order to export them as a final fully assembled file ready for printing.

VID_20181024_134222 GIF

A little bit of laser cutting and timber work by a colleague really helped bring the design to life, and again, the trophy encourages interaction and play. Congratulations to the winners and finalists, I hope you enjoy your awards as much as I did creating them. With any luck I might get to design them again in 2 years and bring one home myself for real! 😉

– Posted by James Novak

3D Printed Webcam Mount

IMG_20180917_Webcam 3D Print Mount

Whenever I travel I always have a small Guerrilla tripod to easily mount my cameras just about anywhere – the flexible arms make it perfect for wrapping around handrails or quickly levelling on uneven surfaces. Which made it my first choice when it came to mounting an old webcam so I can begin streaming my 3D prints to Youtube!

I’m seeing a lot of people like @wildrosebuilds posting awesome time-lapse videos of their 3D prints, and plenty of tutorials online showing how to build quite elaborate rigs to do so. I don’t really have time to deal with all of the video editing for each print, but the opportunity to live-stream prints directly to Youtube seems like a great way to share what I’m working on in real-time, and also allow me to monitor prints without having to physically be with the printer. However, webcams aren’t designed to mount to the typical screw mechanism used by tripods/cameras, so I had to design my own bracket to allow me to mount an old Logitech C270 HD webcam to the tripod.

The top right image shows the small slide-in clip that screws to the underside of a camera, and locks into the tripod. My first step was to reverse engineer this part with a set of calipers, modelling the geometry in Solidworks. I then added a vertical element to attach to the webcam, which has a hole on the back normally used by a bracket attaching the webcam to a computer screen. An extra lip on the front to hold the webcam in a vertical orientation, and voilà!

The blue bracket has been printed on my Wanhao Duplicator i3 Plus in PLA, and a screw I had lying around holds the webcam to the bracket. A nice little solution that should see some action very soon. Subscribe to my Youtube channel or follow me on Twitter to be alerted when I begin streaming prints, I know it can be a bit like grass growing but watching 3D prints is still addictive to me. If you’d like to download this design for yourself, you can find it on Thingiverse, Pinshape and Cults – feel free to make your own modifications as needed and share, I know the C270 is quite a popular webcam.

– Posted by James Novak

UPDATE: If you want to see my first live-stream using this webcam mount, here it is:

Check out my channel to see more, and subscribe to be alerted when I go live.

Yes I Wrap, Don’t You?

20180831_3D Print Vase Wrap String

One of the common features of desktop 3D printing is the sharp, hard feel of plastic with that scratchy horizontal layered surface finish. Sure plastic has many benefits, but when you handle 3D prints all day long you sometimes forget that there are other textures in the world that are soft, delicate, pleasurable to touch. Enter the wrap, an experiment that softens those 3D prints in a crafty, hand-finished way.

For this project I downloaded the Customizable Twisted Polygon Vase from Thingiverse, which you will notice when you download is a solid block. This print takes advantage of a feature known as “vase mode” in many slicing programs, although if like me you are using Cura it’s called “Spiralize,” and you will need to activate it in your settings in order to have it available in your main screen settings. Basically the idea is that you can load any solid 3D model and automatically turn it into a vase-like shape i.e. a base and an outside wall without any interior or top surface. The outer wall is a single perimeter, which the printer continually extrudes in a spiralling/helical fashion as it works its way up the vertical height of your object. So no need to use a “shell” command in your 3D CAD modelling software, you can design a solid block and let the slicing software automatically create a single perimeter based on the extruder settings of any FDM 3D printer. A fun project in itself.

Phase 2 of the project was to use some wool yarn to wrap the exterior. What’s interesting about this process is that the layered surface finish of the 3D print actually helps hold the yarn/string in place, stopping it from slipping down the vase and helping align each rotation of the yarn. A relaxing project while you’re sitting in front of the TV or Netflix! The yarn I used was very fine so took quite a while, however you could easily use a thicker yarn to reduce the amount of effort to achieve a similar result. The result is really interesting; it keeps the layered appearance of a 3D print, yet is soft to the touch and provides a unique finish to the vase. Something you could easily customise with colours and different types of yarn materials. Ultimately, it creates an interesting combination of a highly digital process with a more craft-based process and material… Something worth a bit more experimentation I think.

If you give it a go, please share a photo with me, I’d be interested to see your results!

– Posted by James Novak